Online education is getting more and more popular every day. People love having the ability to learn at their own pace and to learn when they have the time. That's why building your own online fitness courses is such a powerful move.
Digital products such as reports, guides and e-books were once a legitimate way to create passive income. A personal trainer could create a workout plan, turn it into a PDF, and sell it over and over again online.
Times have changed a bit. As the online fitness industry matures, more competitors are trying to sell those types of products. You need to be different. You need to offer more value. One great way to do that is by creating your own course.
What's Different About an Online Course?
Unlike digital products like an e-book, online courses are broken down into specific lessons that come with action items or homework. They are much like a college or university course: You learn something and then you apply that knowledge.
Most good courses lead people from "Point A" to "Point B." There is a specific end point in mind that really appeals to students who might sign up. For example, my 10 in 4 Challenge started out as a coaching program, but was converted into an online course so that women could go through the materials on their own and still achieve the intended objective of losing 10 pounds in 4 weeks.
ACTION STEP: Start thinking about what your ideal clients really need. How could you break that down into lessons and homework steps that could be conveyed via an online course?
Why Don't More Trainers Create Online Courses?
Online courses are typically delivered via an email drip or through a membership portal.
Email courses are delivered via dripped messages, meaning that students get a new lesson at a pre-determined time interval. For example, my clients get their first lesson about eating guidelines on day #1 and then receive a lesson about hydration on day #2, and so on.
Email drip courses are simple to set up using any autoresponder software such as Mailchimp or Aweber, but they take a lot of time to build. One other downside is that the course content is delivered at a set time interval, which could make students feel overwhelmed if more content is delivered before the student has finished the previous content.
Alternatively, membership portal courses can be created to allow students to check off completed materials as they go. When a student completes one lesson, the next one is automatically unlocked for them to begin working on.
Membership courses are awesome. I typically build mine in Clickfunnels, which makes it pretty easy, but even still they require a ton of up front work, plus some tech skills to make everything work properly.
The good news?
Facebook has recently added some new features that give you another option...
How Can You Create an Online Course Using Facebook?
You can use an existing Facebook group, or set up a new one to launch your online course. Here's how to get your online course started on Facebook in three easy steps:
1. Set Up Your Social Learning Facebook Group
As I just mentioned, you can use a group you have previously set up, or create a brand new one for your online course.
Once you've gotten your Facebook group set up, you'll need to ensure it's the right type to support your online courses.
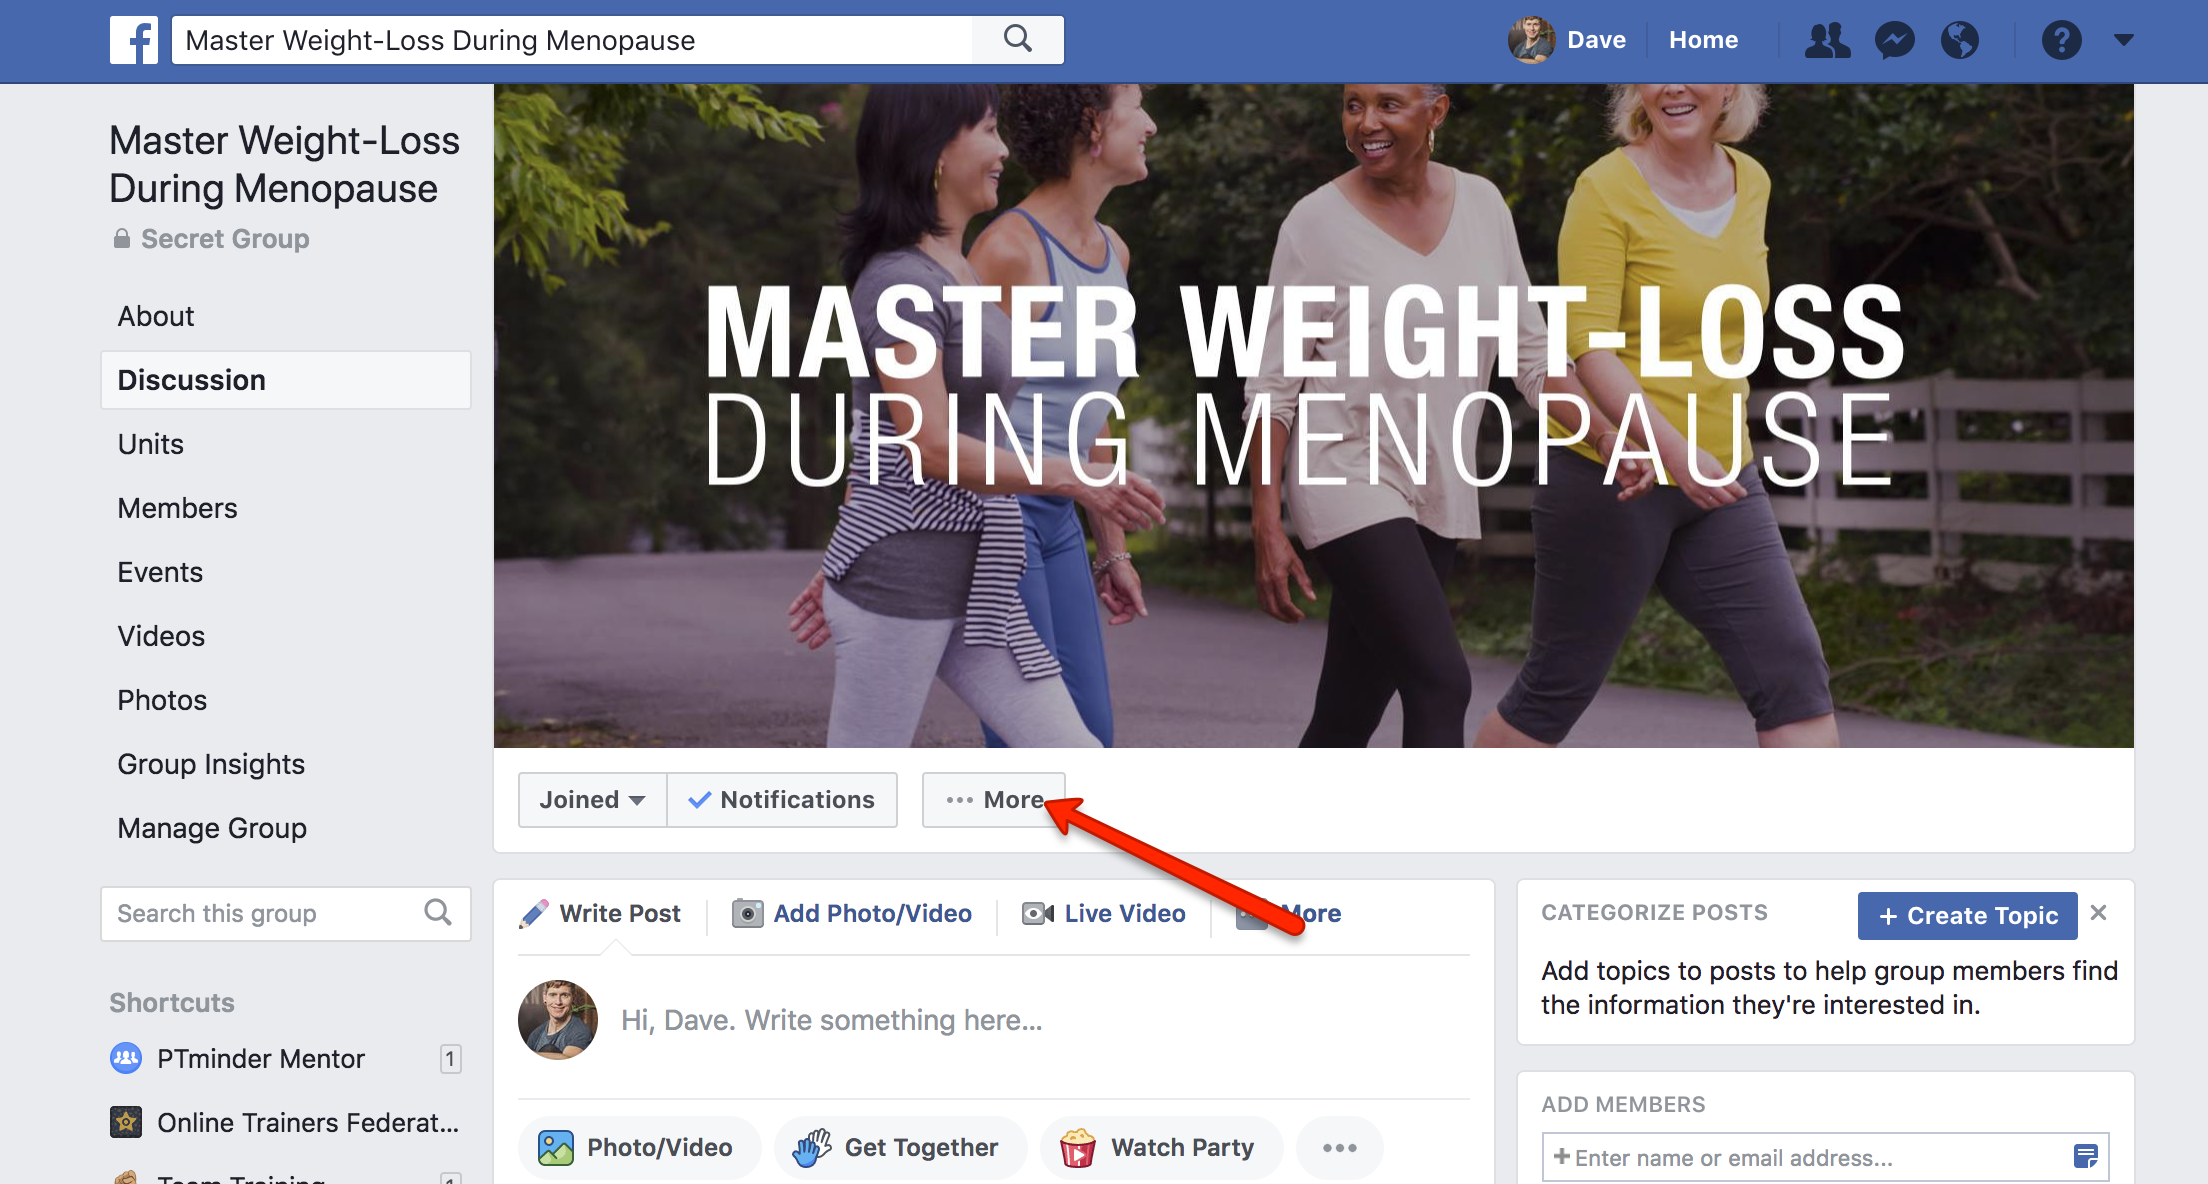
Start by clicking on the "More" button below the header on your group page:
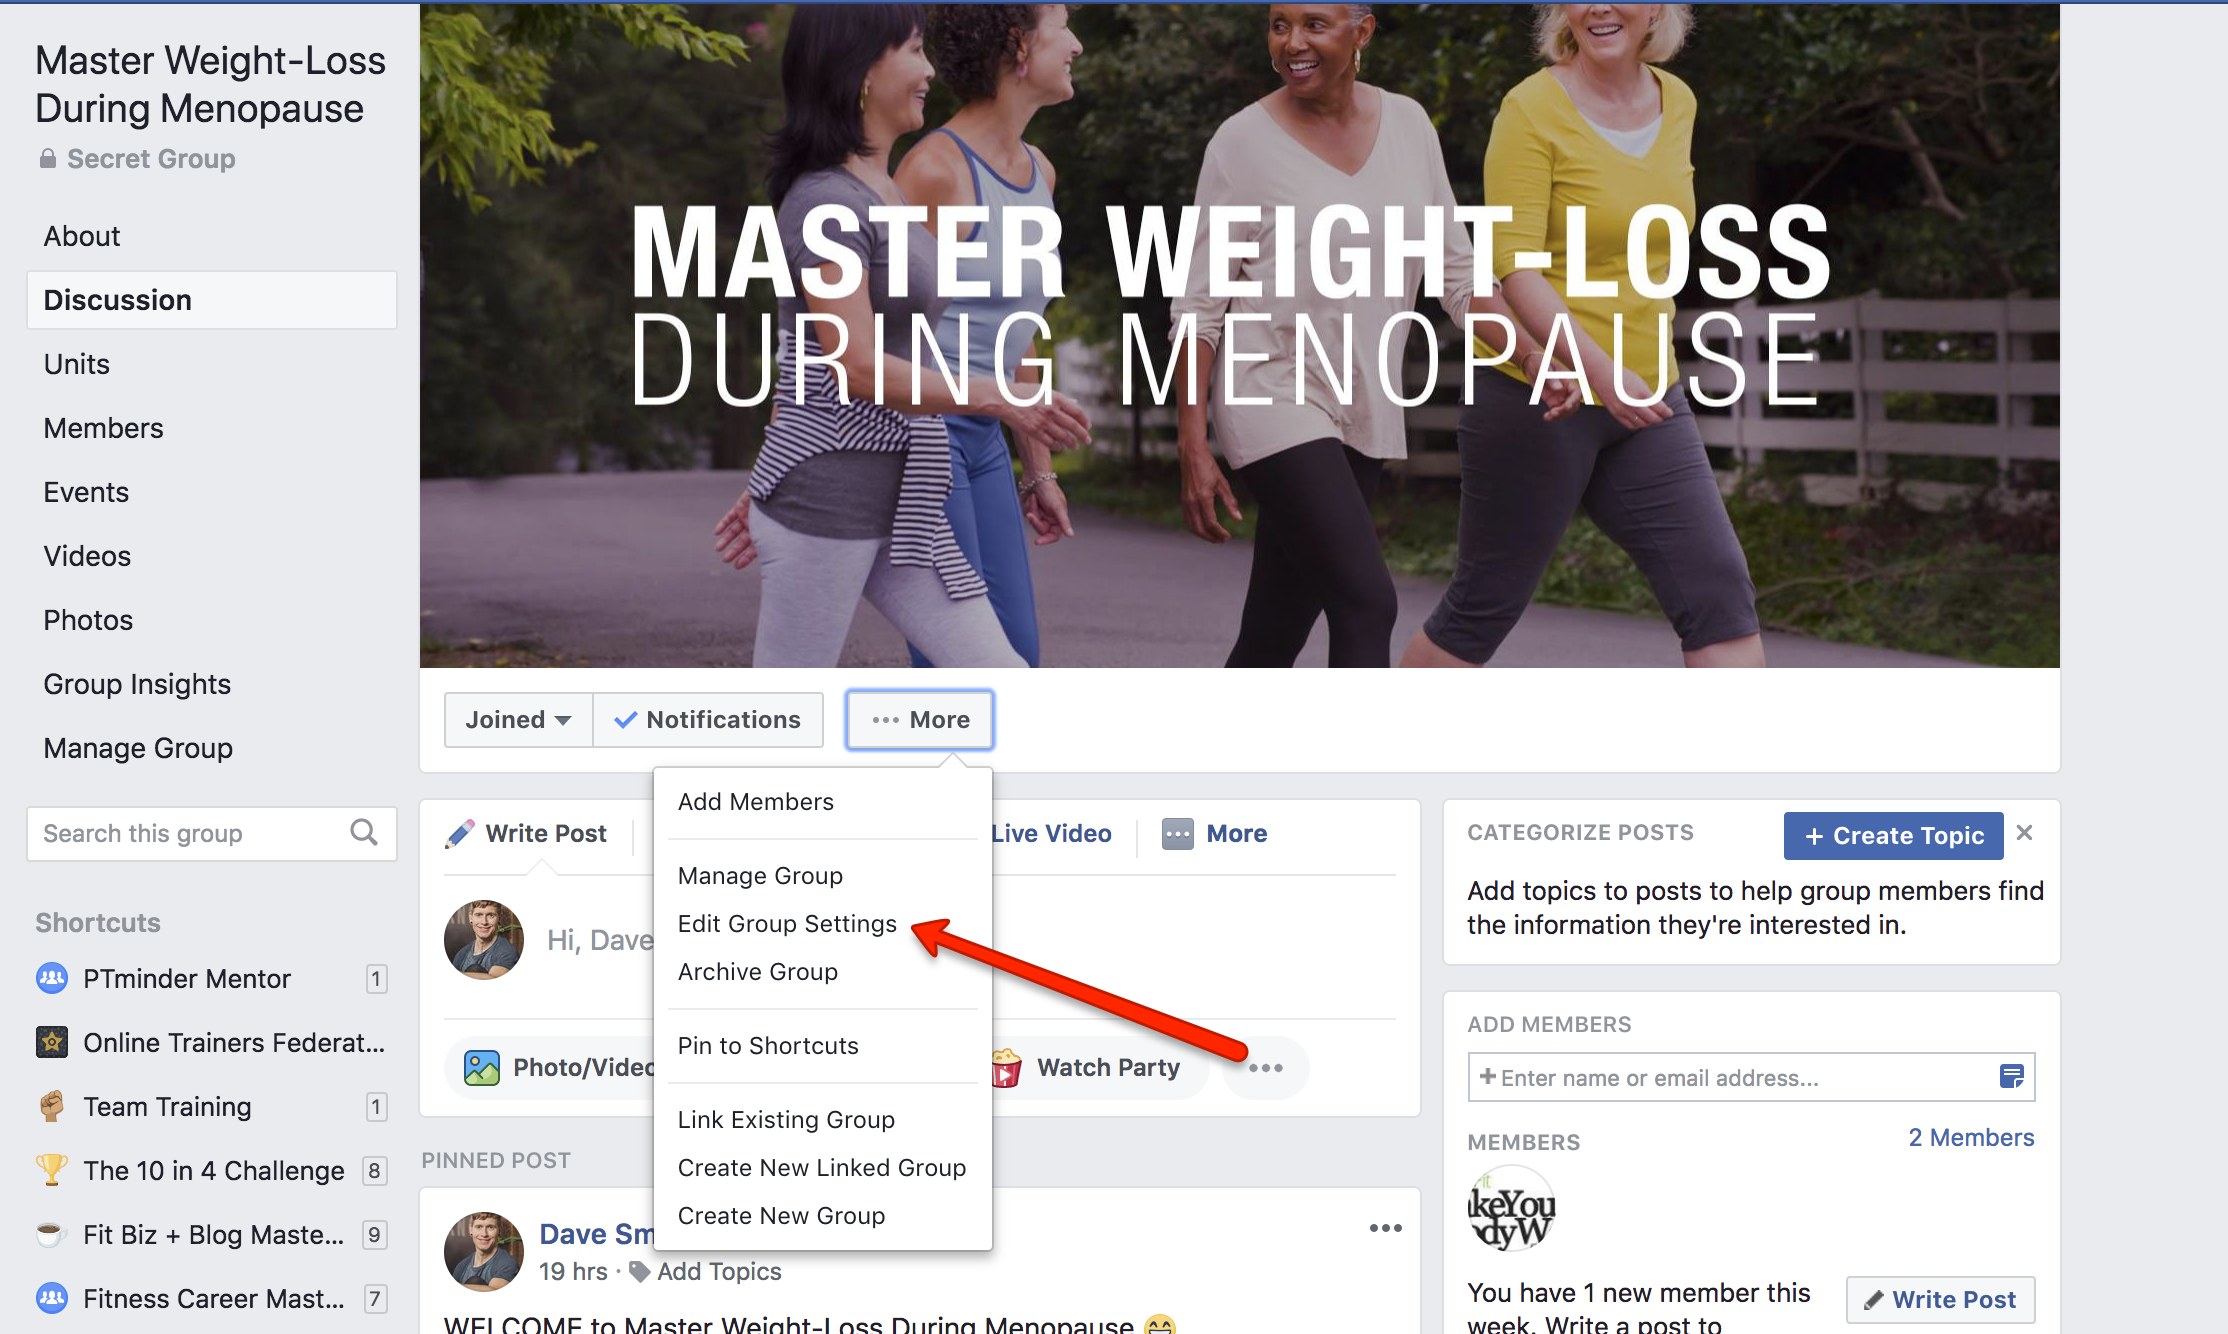
Then select "Edit Group Settings" from the drop-down menu:
The next step is for you to change the "Group Type" to "Social Learning":
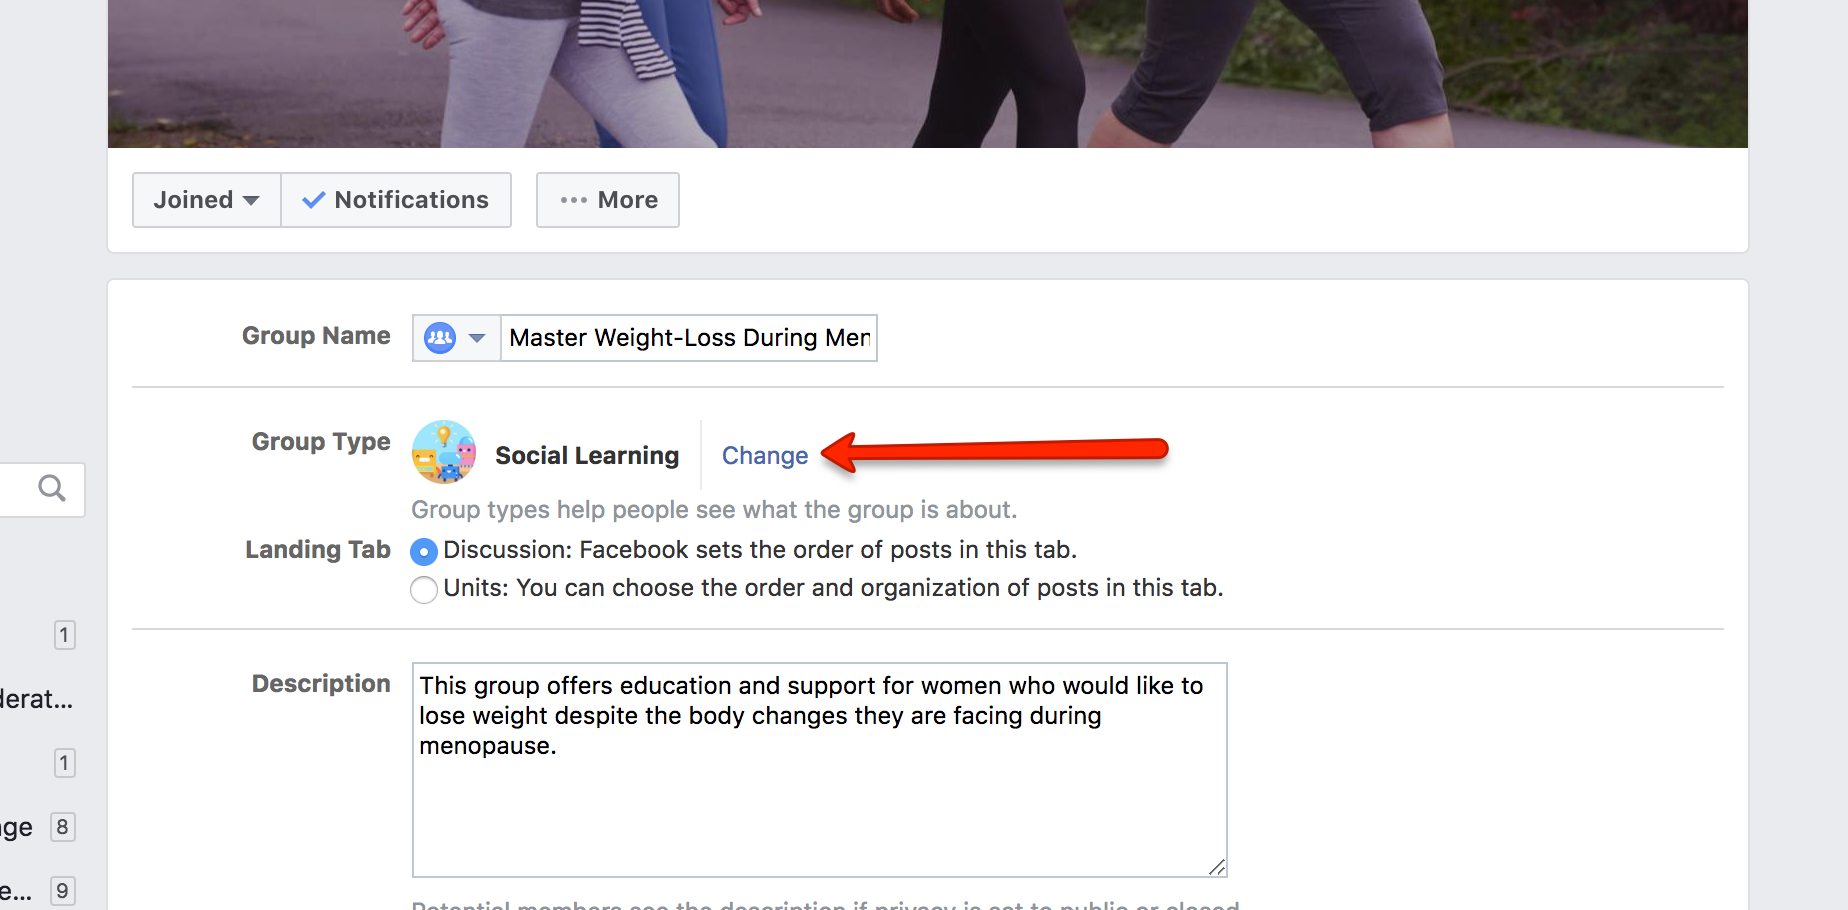
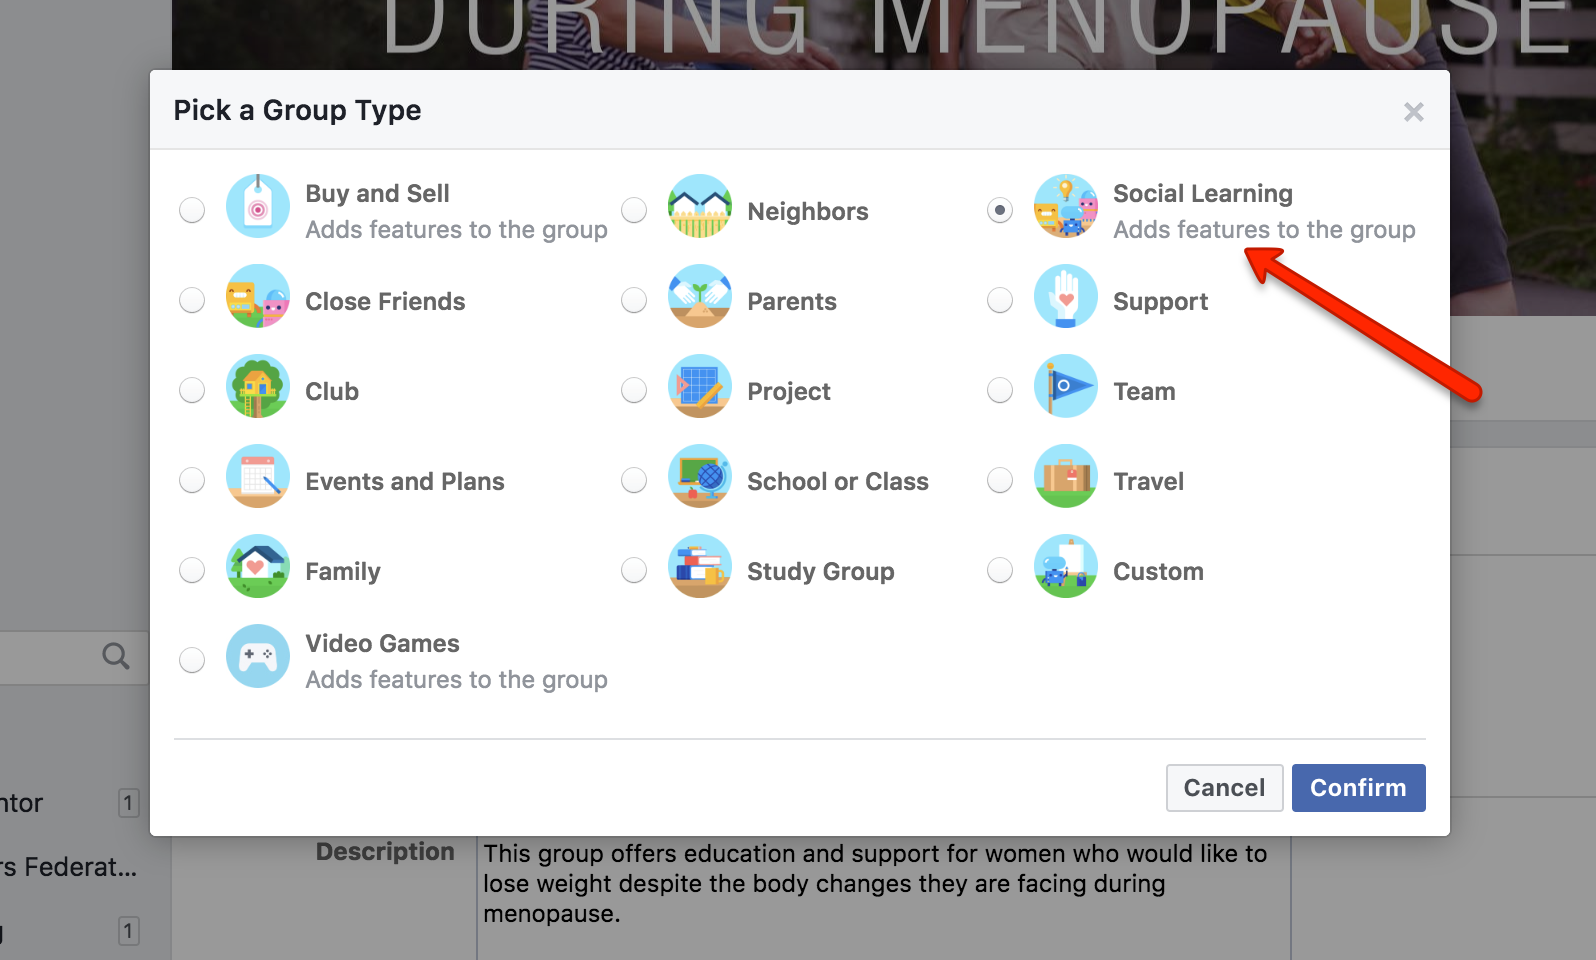
Hit "Confirm" and that's it! Your Facebook group is ready to become your online learning platform. Now you can start adding your content.
2. Build the "Units" for Your Course
The next thing you'll want to do is create your units. Each unit will serve as a separate lesson for your audience.
Start by selecting "Units" from the menu on the left:
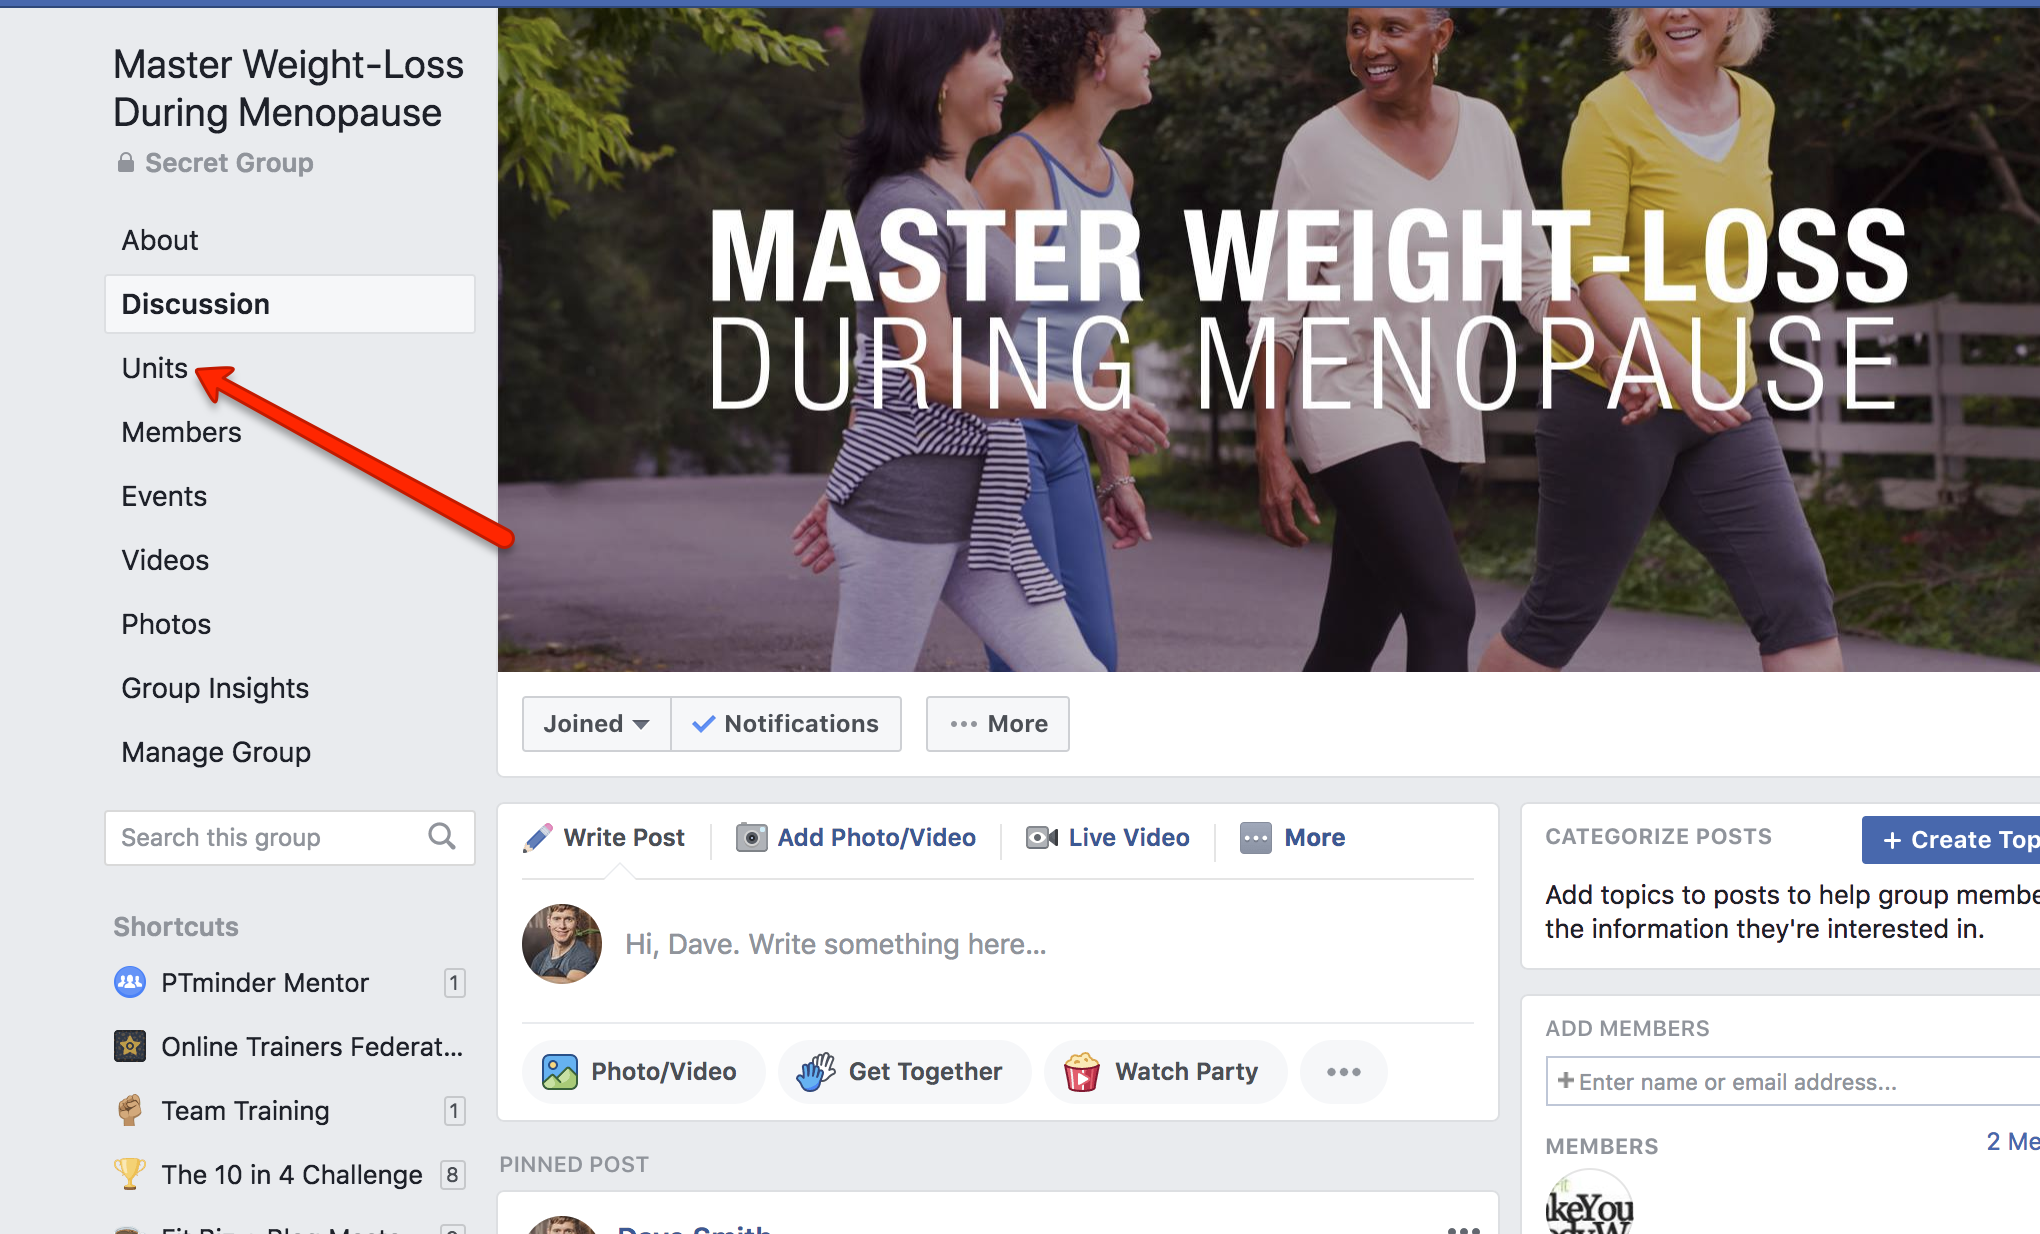
You can decide how many units to create based on the structure of your lessons. For example, if you're doing a 4-week long training course, then you can create one unit for each week. This makes it easy for your audience to keep track and follow along.
Create your units by selecting the "Create Unit" button:
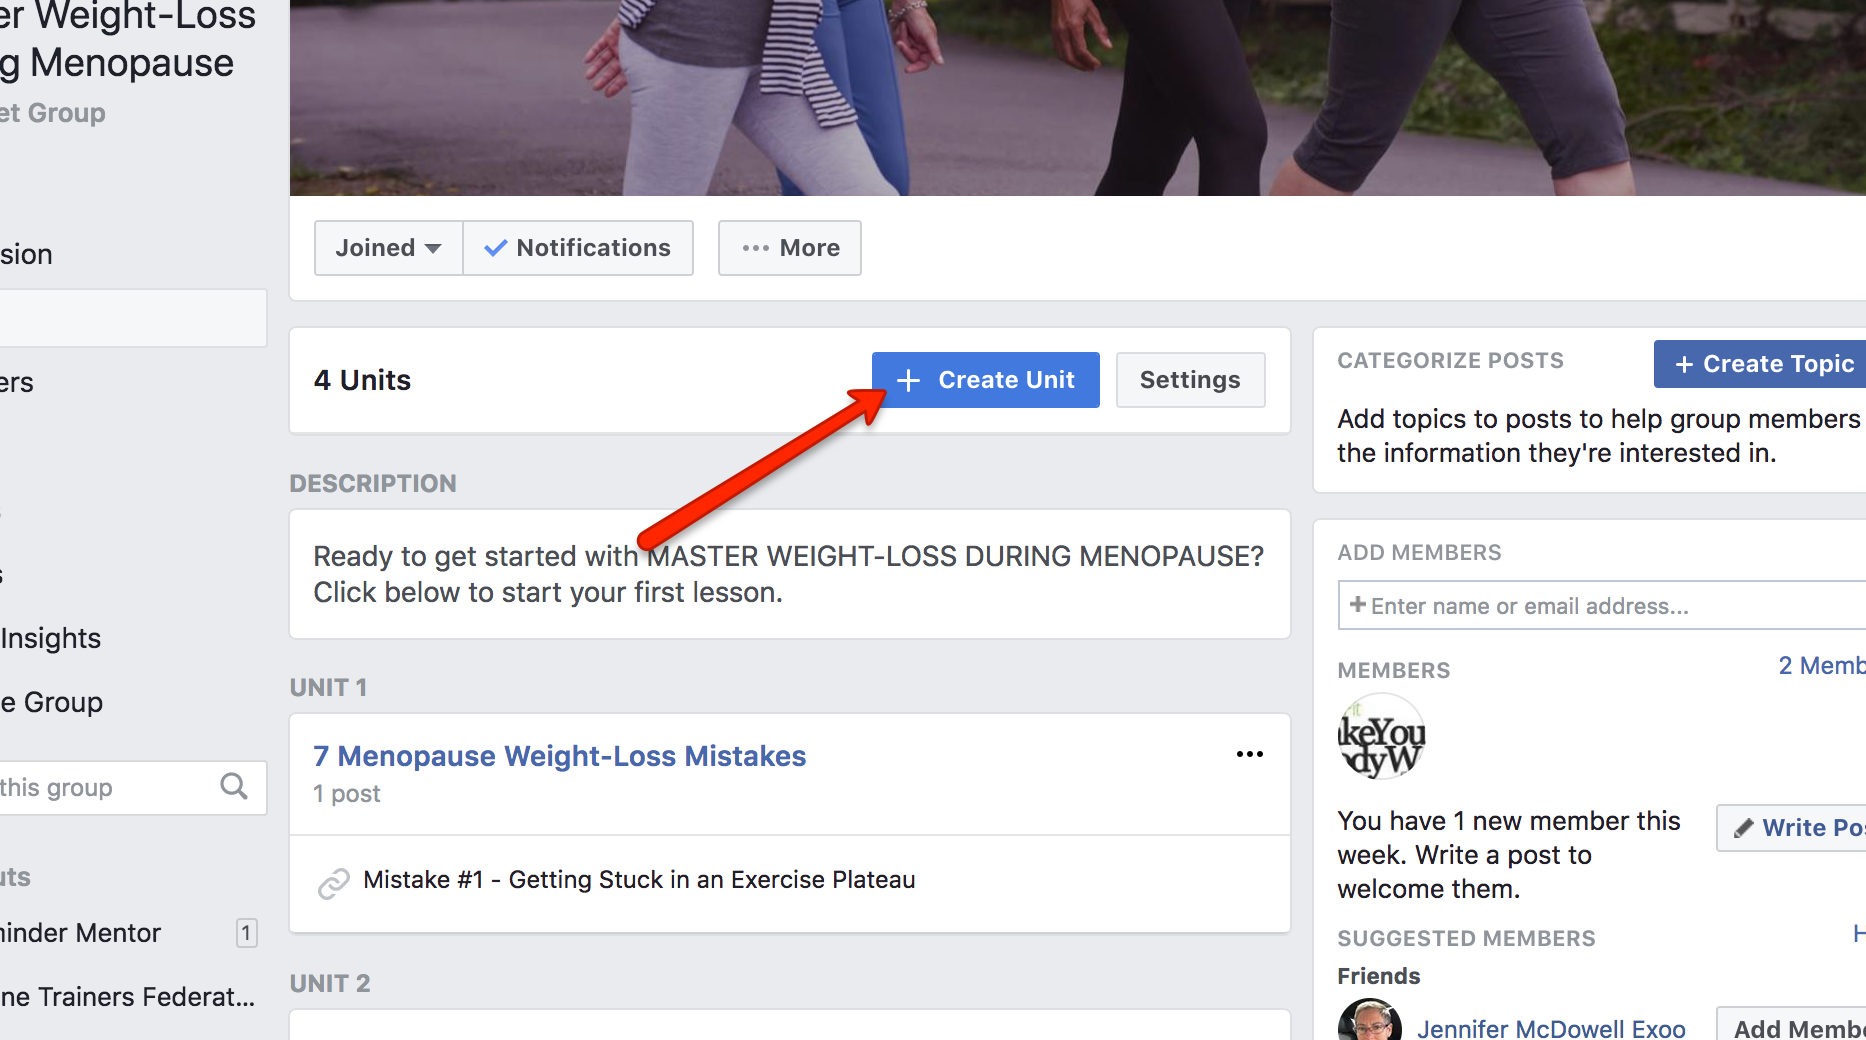
It's important for you to tell your members what they have to do before moving on to the next lesson. This will keep them participating in the group. A good way to do this is to create a specific call-to-action for each unit, for example, "Post a picture of the dinner you created using the guidelines in this lesson."
Create a description for each of your units, similar to how you'd create a description for any Facebook post:
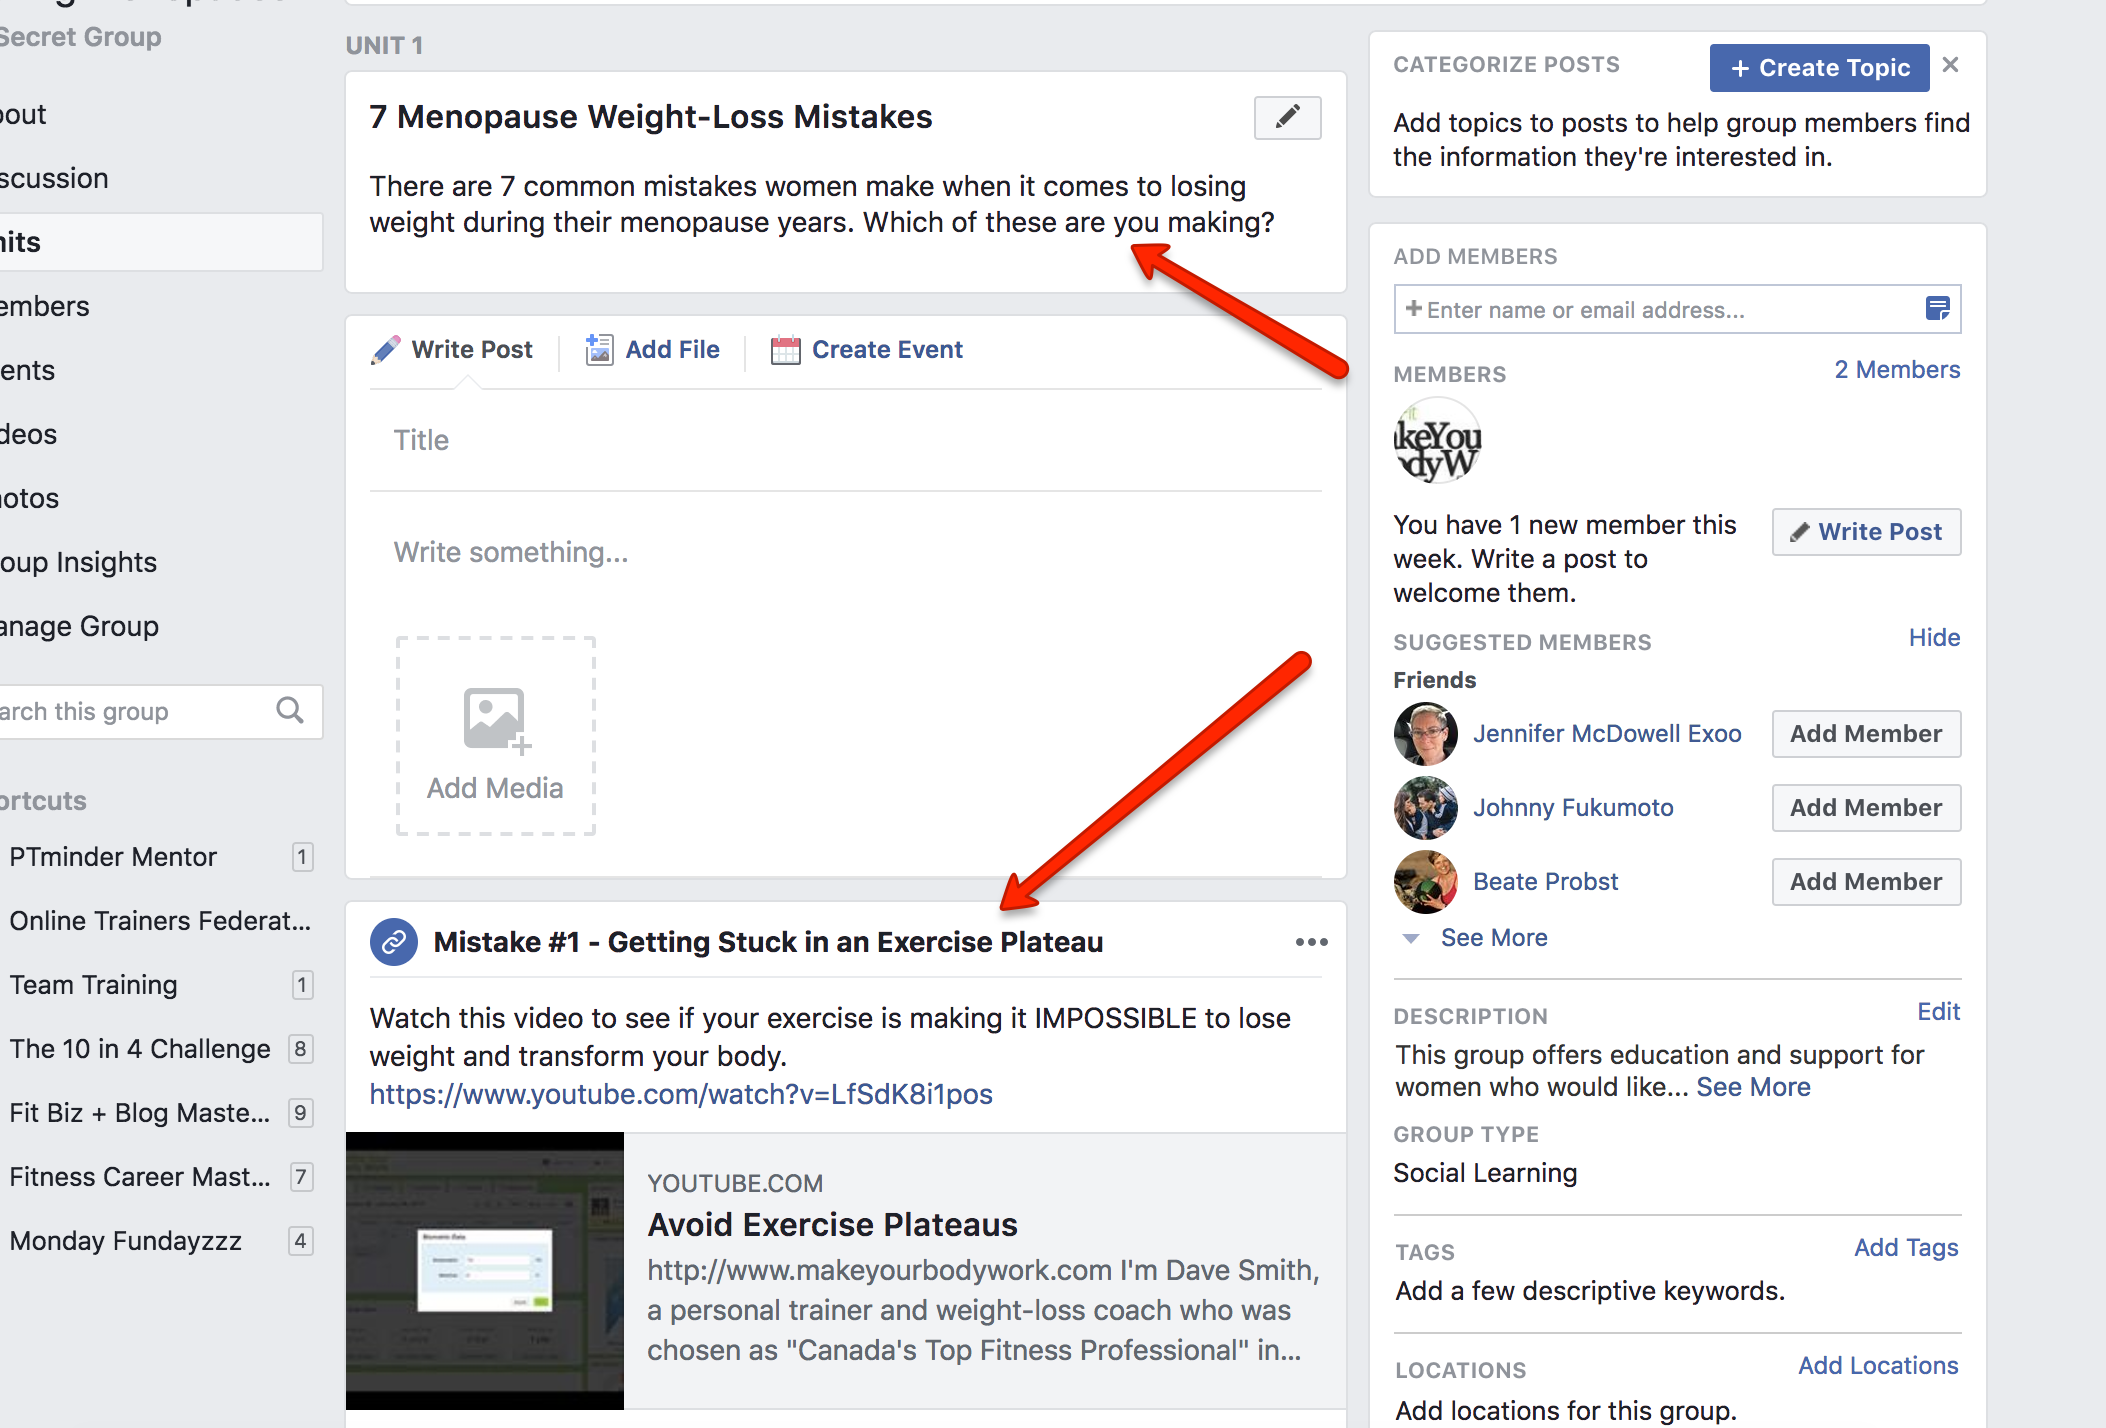
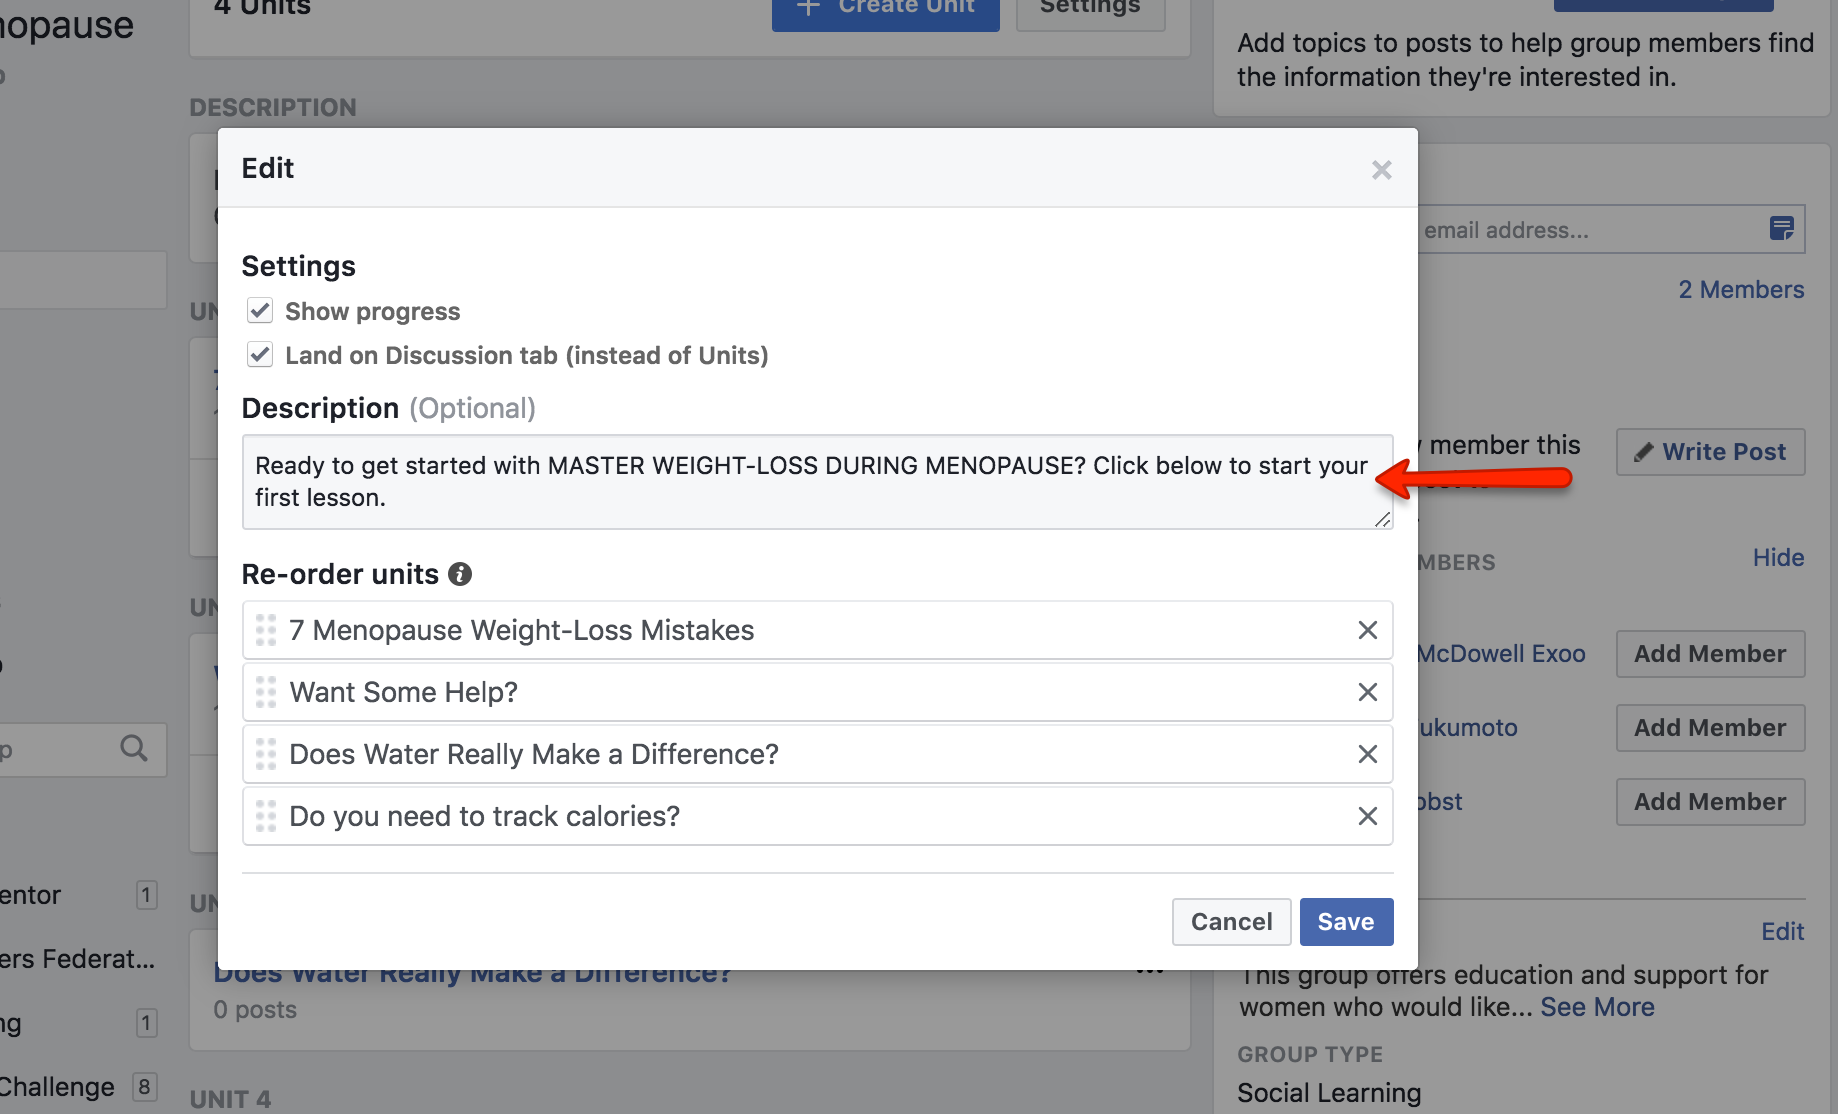
Another thing you can do is add a general description for your course from the main Units tab. This gives your audience a good idea of what to expect throughout the course. You can also rearrange your units here if you wish:
3: Introduce Expectations to Your Group Members
Once you've gotten your course all set up, you need to make it very clear to your members what the expectations are for the course. A good way to do this is to pin a video post in the main discussion area that explains how the group works:

Important Note!
According to Facebook terms and conditions (at the time of writing this article), you absolutely cannot sell membership to a group on Facebook. It's important to know because you cannot set up a group like this and then charge fees in order for members to access your content.
It's definitely not worth the risk of violating the Facebook rules, especially since there are other ways you can monetize your Facebook group.
One Last Thing...
In case you need some more information on how to set up your Facebook group for online courses, here's a video that gives you some extra guidance:


