So you’ve seen all these viral YouTube videos, but still can’t figure out how to hit one million views?
Maybe you’ve created some high quality videos that you know your clients would love, but the views and likes aren’t matching up?
Or, maybe you have no YouTube experience at all, but you’re ready to break into the world of video marketing?
Either way, I've got something very important to show you...
YouTube is a great platform to find new clients and boost sales, especially as an online personal trainer. Not only does YouTube give you the ability to share videos and get feedback from clients, but it provides a number of extra tools and tricks for brand-building and selling that many content creators overlook.
Warming Up: Youtube Basics
Before you begin on YouTube, you want to start by turning some of your best content or ideas into video format. Here are some great tips on using video to build your brand.
You can get started with even 1 or 2 videos, so don't stress too much about the content itself at this point. It's all about how you use your content.
Remember potential clients are scrolling through YouTube videos very quickly, so be sure to edit your brand info and icon to you catch the eye of potential clients and encourage them to explore your channel.
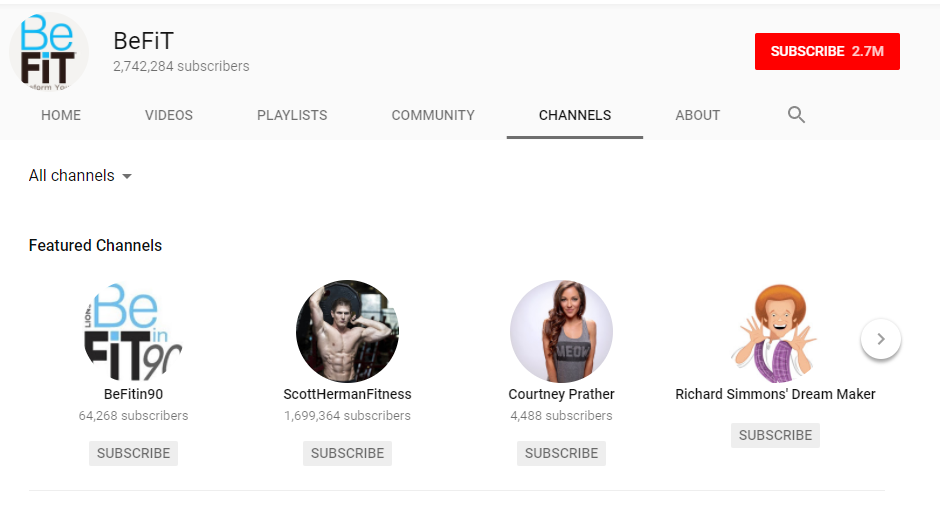
Here are a few examples of different personal trainer channels that stand out well
YouTube gives you the options to create different channels to organize your videos into categories, and you can also create playlists. This way, you can use plenty of different video themes to focus on all the different areas of training.
For example you can use channels to separate “Healthy Eating Tips” videos from “Strength Training” or “10 Minute Workouts” so your viewers easily just click to what they want to see. This encourages viewers to come back to your page to explore your other channels at different times.
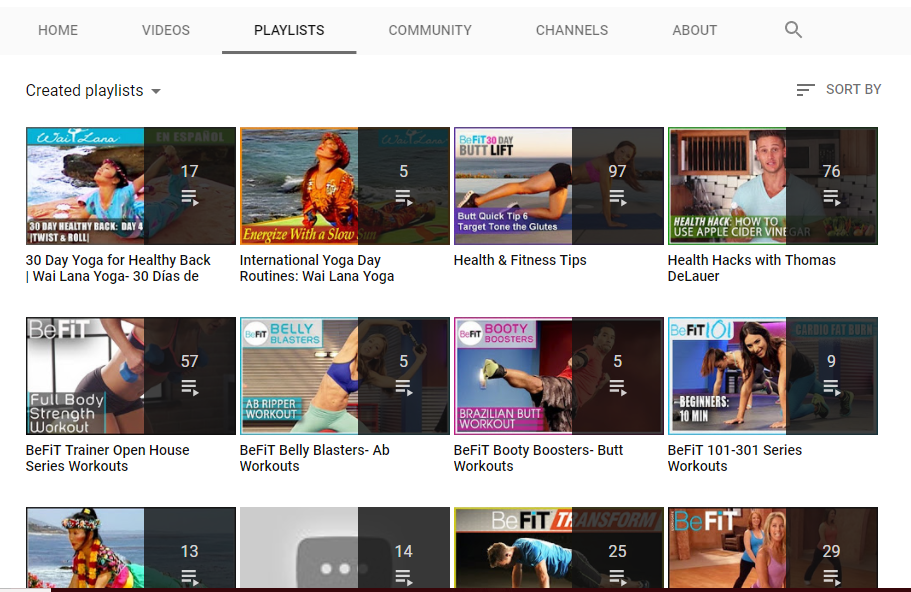
Here are some examples of different playlists that might inspire you
YouTube also gives you the option to direct your viewers straight to your website with simple link embedding. Here's how:
Adding this associated link will help you build traction for your website, and can turn a one-time viewer into a lifelong client by giving them the chance to get to know more about you. Don't forget you'll need to supplement this by taking steps to convert your interested visitors into long term paying clients.
You're On Fire: YouTube End Screens
Now that you've got your Youtube channel all set up, it's time to use one of the most overlooked marketing tools on YouTube...
End Screens may just be the holy grail of YouTube tools. They’re easy to use, very visible and super-effective at attracting viewers to explore more of your content.
End Screens are a collection of large buttons which direct viewers to click through to your other videos or subscribe to your channels. They appear at the end of your existing videos, so all it takes is one video to get your viewers hooked.
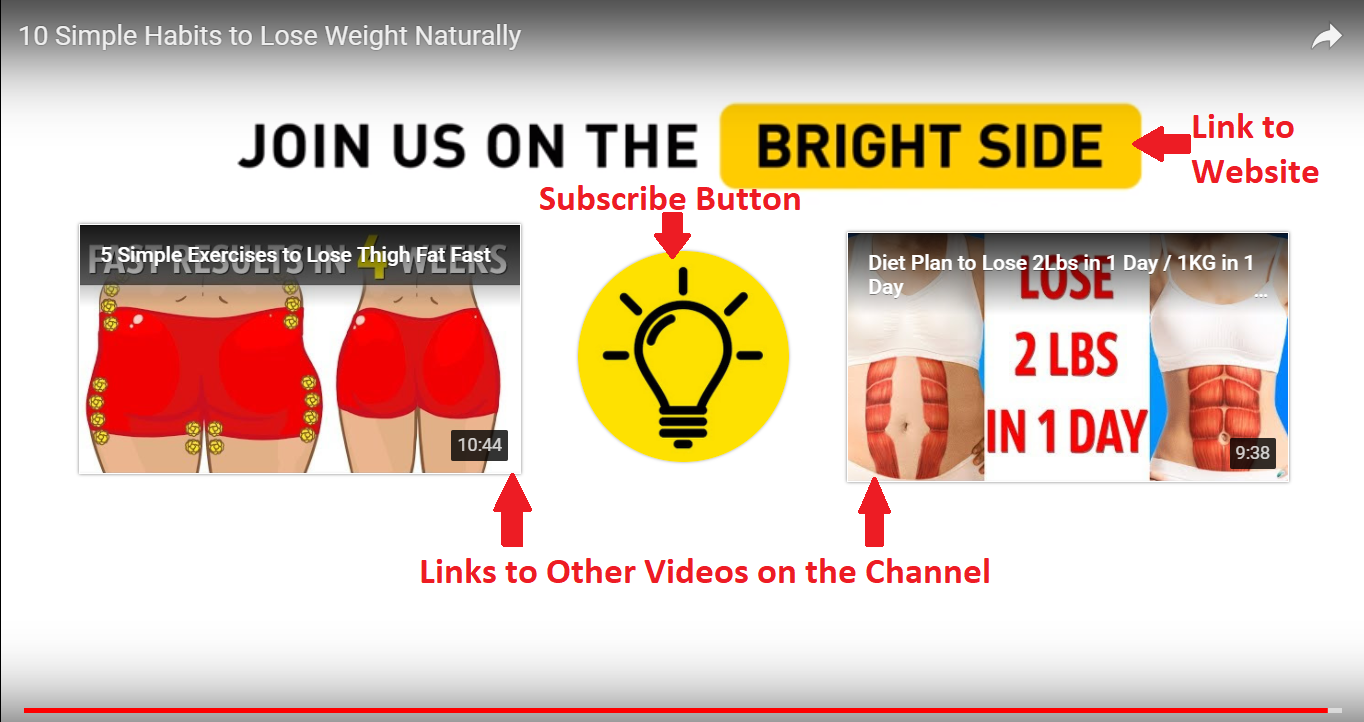
This End Screen offers a viewers a chance to subscribe, visit a link, or watch more videos
End Screens are made up of different elements, and you can use a maximum of four. These elements are Subscribe, Channel, Link, and Video or Playlist. We’ll look at these in some more detail in the next sections.
How To Use YouTube End Screens
Once you’ve uploaded your video to YouTube, you can add an End Screen by visiting your Creator Studio.
Start by clicking the “Video Manager” option on the left, then click along the time bar at the bottom of the screen to select where in the video where you want to add an End Screen. Then click the “End screens & Annotation” tab at the top of the page.
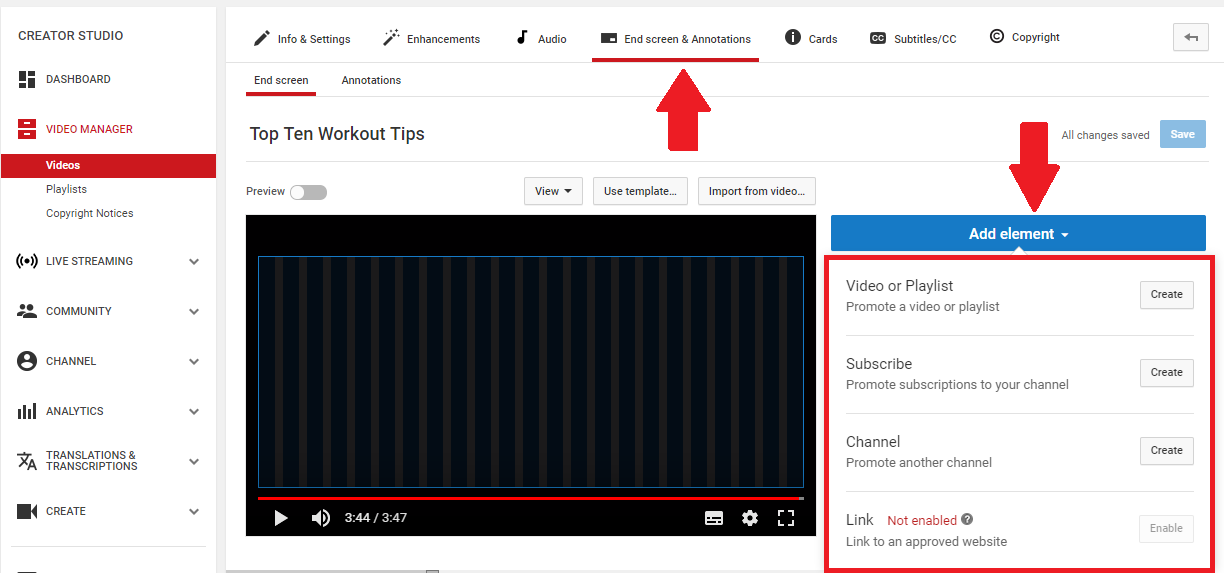
"End Screens & Annotations" Tab in YouTube Creator Studio
Click the “Add Element” button on the right, and a menu of element options will appear.
1. Embed a Video or Playlist
Every YouTube End Screen must link to at least one video or playlist. You won’t be able to save your End Screen without this element. This element allows you recommend another one of your video’s for your viewer to watch next. It also allows them access to these videos with a simple click.

When you click this option, you’ll be able to choose which video you want to link to. You can choose the “Most recent upload” which will link to whatever your latest video is, or you can allow YouTube to select one of your videos for you by choosing the “Best for viewer” option. You can also “Choose a video or playlist” from your collection, or enter a YouTube URL.
2. Add a Subscribe Button
You can use the Subscribe button to get more subscribers to your YouTube channels. With this, viewers can click to subscribe to the channel that they’re watching or just hover over the button to get more information about the channel.
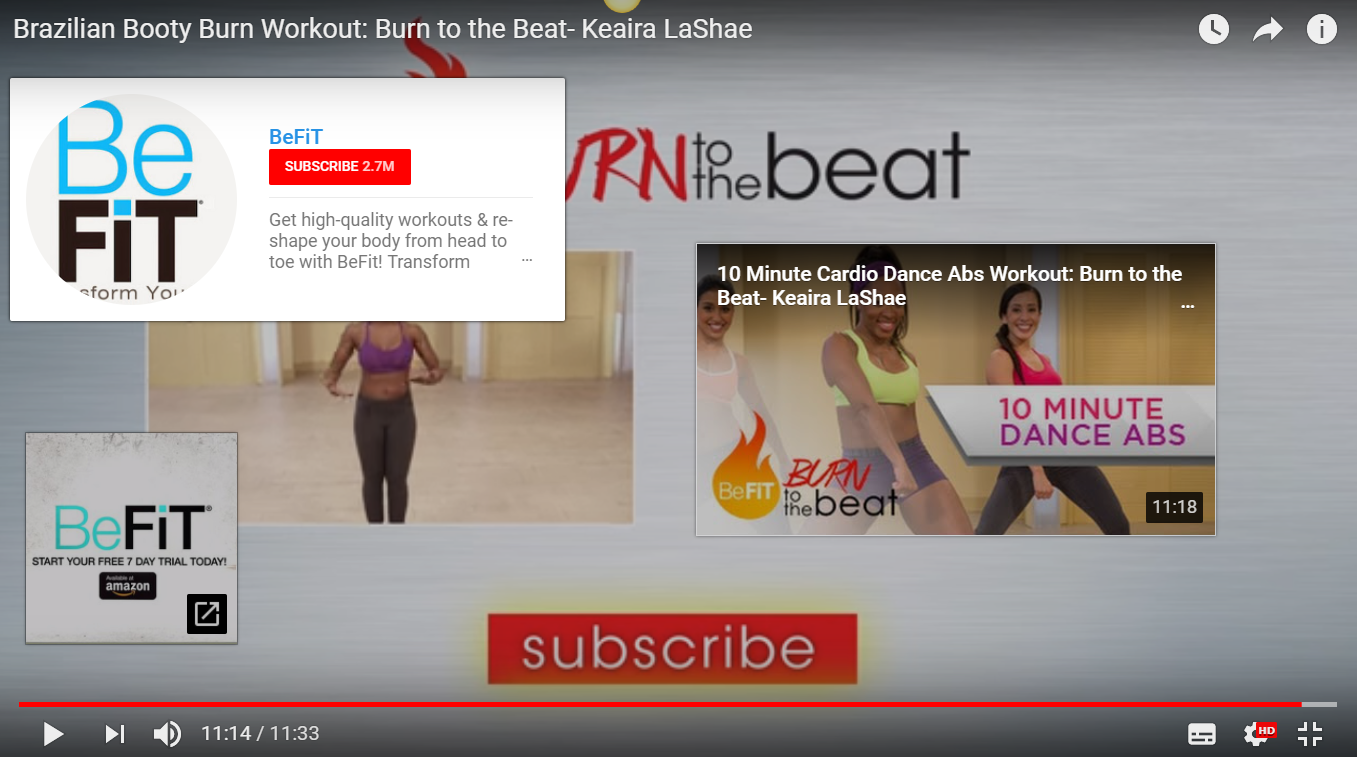
Hovering over the Subscribe button allows users to see your channel information without leaving your video
If you click the Subscribe option, you automatically add a button which allows users to subscribe to your channel.
3. Promote Your Channel
The Channel button allows you to promote another channel on your YouTube page. Similar to the Subscribe button, viewers can click through to the channel or get more information by hovering over the button.
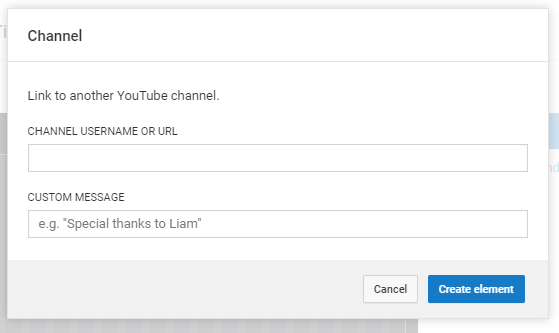
By clicking the Channel option, you can promote any YouTube channel with a simple message to your viewers to encourage them to visit. You can promote another channel of your own, or someone else’s channel.
4. Add a Link to Your Website
Finally, you can choose the Link option, which creates a button that directs viewers straight to your site. How awesome is that?
The Link button allows viewers to visit your website with a single click. Hovering over the link button will give viewers a short description and the URL of your website.
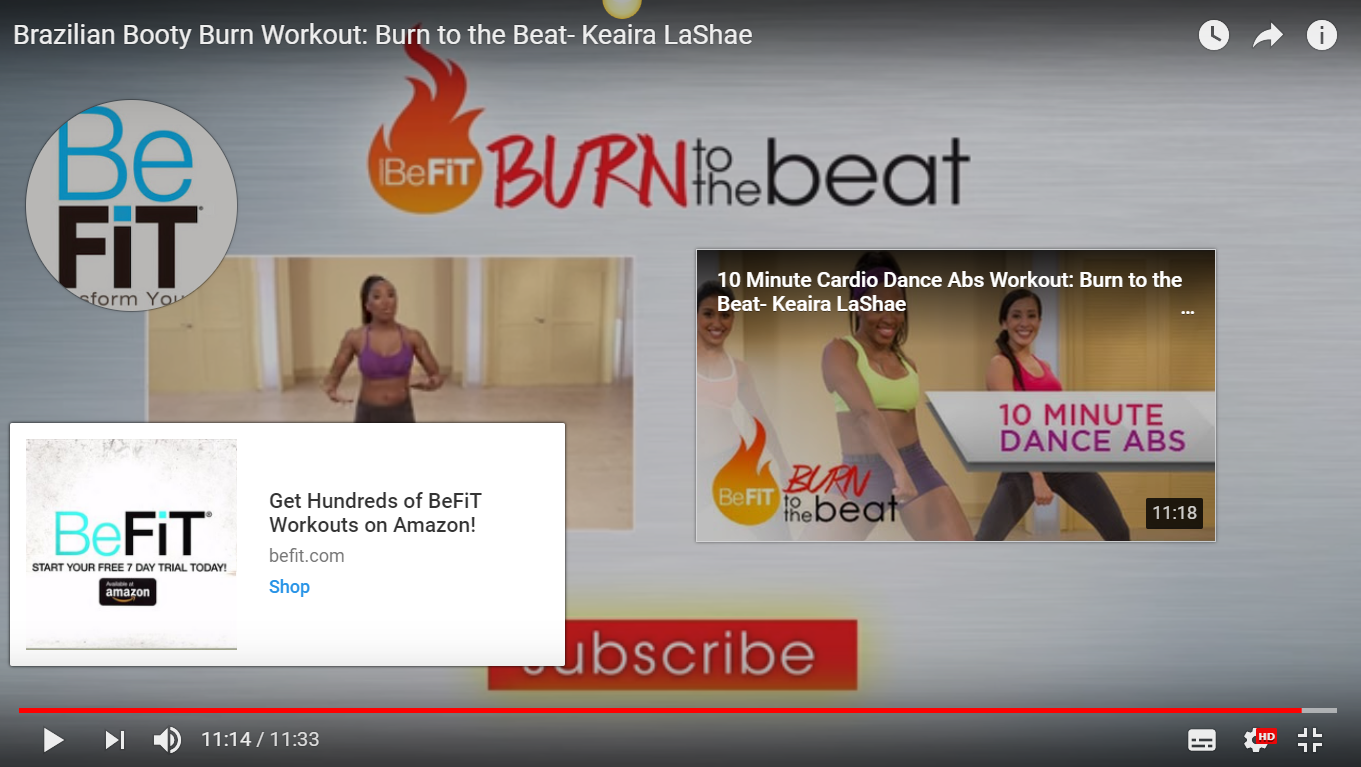
Hovering over the link button will give your viewers a brief description of your website and direct potential clients to visit/shop/sign up with you.
However, due to recent rule changes by Google, adding a link to your End Screen has become a little bit more complicated. Don’t worry, it’s not that hard to configure, and it’s definitely going to be worth it if you want to attract new and repeat clients.
In order to add a Link to your End Screens, you first have to sign up for an Adsense account and turn on the Monetization feature. You do this in the Status and Features section of your Channel settings. Visit this page for more instructions on completing this step.
Once you’ve done this, you can set up an associated website in the Creator Studio by clicking on the “Channel” option on the left and then clicking on “Advanced”. Simply enter your URL in the “Associated Website” box and click “Add”. A screen will then appear where you’ll have to prove you’re the owner of the website. Just follow the simple instructions and you’re good to go!
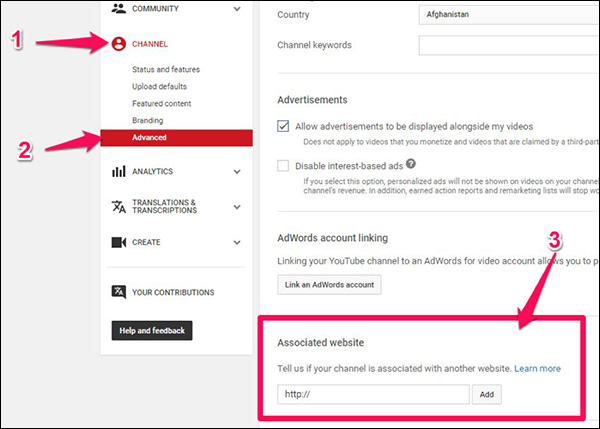
Once you’ve finished all this, you can return to the End Screens & Annotations page to add your website to the video. Clicking the “Link” option under the “Add element” button where you enter your website URL. Click “Next” and you’ll be able to create a Headline, Call to Action button, and upload an image for your site. Then simply “Create Element” and you’re all set!
Don't forget to Save your End Screen when you're finished so you don't lose all your hard work!
4 Pro-Tips For Making Your YouTube End Screens Next-Level
Now that you know how to use End Screens, here are a few additional tips to create the best End Screens to generate more clicks.
1. First, think about what you are trying to achieve with your video. Are you looking for viewers to get to know your brand, or to visit your website and sign up for your services?
If you align your Call to Action buttons in the End Screen with whatever goal you have in mind for the video, viewers will be naturally inclined to click on your End Screen elements. Check out this post for some tips on creating the perfect call-to-action.
2. Ensure you give your viewers clear instructions about exactly what you do, where they should click, and why. Clearing up any questions about what your buttons do will encourage viewers to click on them. You can also tweak the time you display each End Screen element for.
For example, you can set the link to your website to appear before the link to your video and playlists, giving viewers more time to click your website link before the video appears.
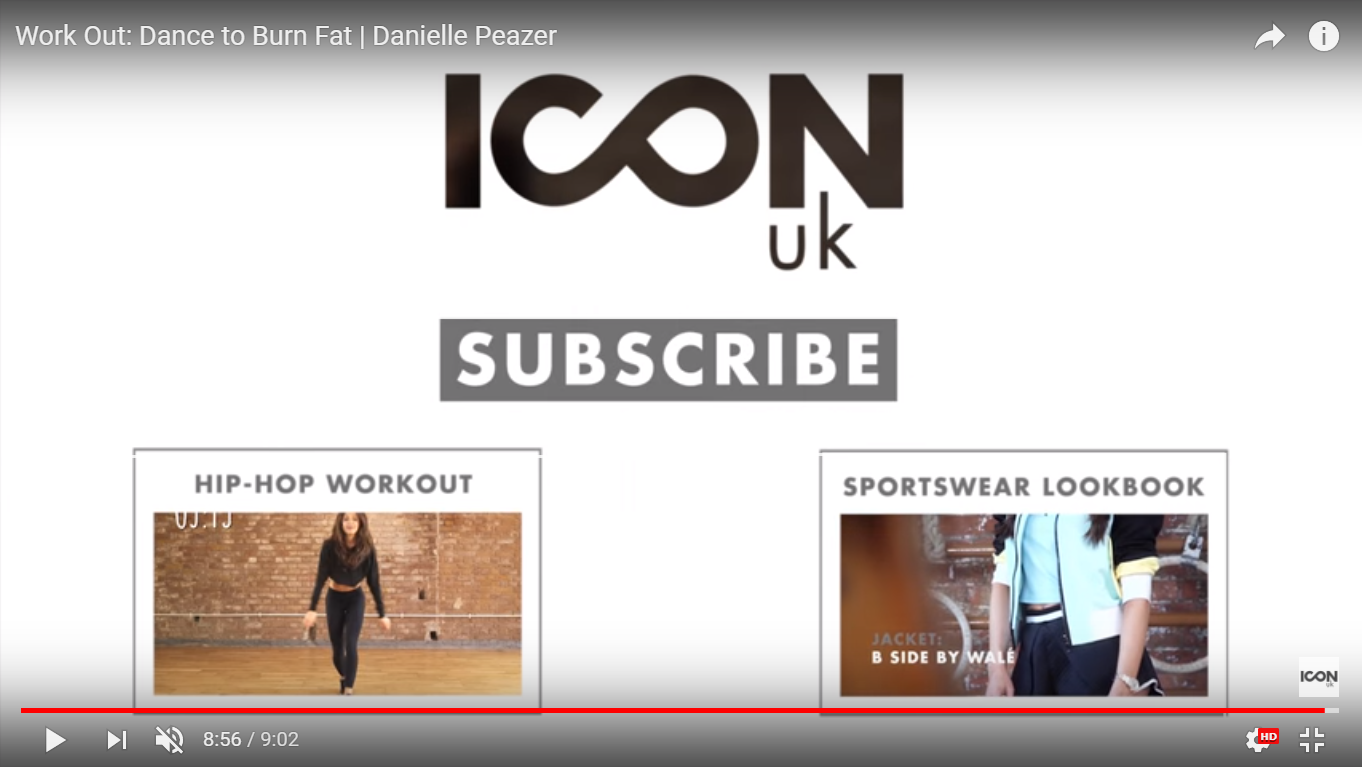
See how this End Screen uses a very clear call-to-action so that viewers know exactly what to do next
3. Also remember your End Screen will only display for 20 seconds, so the clearer you make it, the easier it will be to generate clicks. If you give your instructions before the End screen appears, you save valuable time and maximize your clicks.
It is very important to extend your video by 20 seconds to accommodate the End Screen, to avoid your screen appearing over the content of the video. If you don’t do this, you could end up confusing your viewers and they will be so busy paying attention to your video that they miss the call-to-action in your End Screen.
You can extend your videos using your video editing software before you upload to YouTube. Here's an example of how you can do this with a simple video editing tool called Wondershare Filmora.
4. Think about what device your targeted viewers will most likely be using and design your End Screen to best suit them. Longer sales pitches are better suited to desktop users, while mobile users prefer quick and easy call-to-action options.


